Travel Photography Tips: Animals and Wildlife
Article and photos by Volker Poelzl
|
|
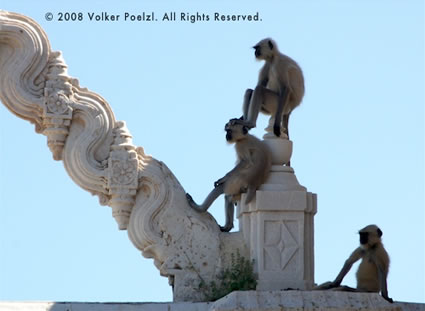
Lemurs sitting atop a temple in India.
|
Travelers are often lured to foreign destinations by exquisite wildlife shots such as stampeding elephants or pouncing lions. As beautiful as these photographs are, they are also quite intimidating for amateur photographers. Most of these shots are taken by professional wildlife photographers who spend weeks in one location, use expensive equipment and often work with assistants, which most amateurs cannot afford. But I have found that with decent photo equipment, a little bit of practice, patience, and luck, amateurs can also take great pictures of wildlife and animals during their travels. The images might not quite match the wildlife shots in National Geographic magazine, but they will be good enough for large prints, to show to friends and family, or even to publish in a magazine or book.
Camera Equipment
A good camera is your most important tool for taking wildlife shots. A single lens reflex camera (SLR) is your best bet for wildlife photography, since it allows you to switch lenses and have better manual control over exposure settings. Compact digital cameras are great for snapshots, but the small range of their built-in zoom lens and limited manual control make it difficult to take photos of animals and wildlife. You can use the digital zoom function to increase the image size, but this only increases the picture size and not the image quality. Digital SLRs also allow you to shoot in continuous shooting mode, taking several pictures per second. This is great for taking photos of moving animals. Without having to worry about the high cost of film, you can take an infinite number of shots, select the best ones and delete the rest. During a recent Central America trip I took about 30 photographs of howler monkeys moving through the jungle canopy. Although a good number of pictures were blurry, I ended up with a few sharp photos, which was all I wanted.
Not only is it important to get the best camera you can afford, but also the best set of lenses. Natural lighting conditions are often unfavorable for wildlife photography. Many animals prefer dusk or dawn for their activities, or they may live in dark forests, where it is nearly impossible to take sharp photos with an ordinary zoom lens or a compact digital camera. If you are interested in wildlife photography, buy the fastest telephoto lens you can afford, preferably with a fixed aperture (which lets in the same amount of light through the entire zoom range). Most ordinary zoom lenses have a variable aperture, which means that the amount of light the lens lets in decreases whenever you zoom in on an object. These lenses allow you to take a decent close-up shot of an antelope on a sunny savannah, but will not work well in the twilight of the Amazon rain forest to take a picture of a monkey. Digital cameras can compensate for low light by increasing the sensor’s light sensitivity, but every time you increase the ASA setting on your camera, you also increase image noise, which affects picture quality.
Some digital SLRs have image stabilization built into the camera body to counteract shaking, while other manufacturers provide image stabilization in their lenses. These lenses are more expensive, but they allow you to take sharp photos in poor lighting conditions. Most digital SLR cameras also have a built-in bracketing function, which varies the exposure of three subsequent shots, allowing you to select the best-exposed photo later on. This can be useful when the automatic metering function may not adequately provide exposure, as in the case of taking a picture of a white bird before a dark background, for example. You can also set the auto focus setting to “single area,” so the camera will focus on one single subject of your choice — a great way to ensure that it is the monkey that is in focus and not the foliage behind him. You can also choose a light meter setting that either focuses on one spot or a larger area, which can also be useful when taking pictures of wildlife.
To be able to enlarge and print your wildlife photographs use the highest possible quality setting, the largest image size, and the finest pixel setting. If your camera can shoot in RAW format, use it whenever possible. Pictures in RAW format are much bigger files than JPEG photos, but shooting in RAW format gives you a lot more control over image adjustments later on. Most photo editing software today is compatible with a variety of RAW image formats.
Observing and Photographing Wildlife
|
|
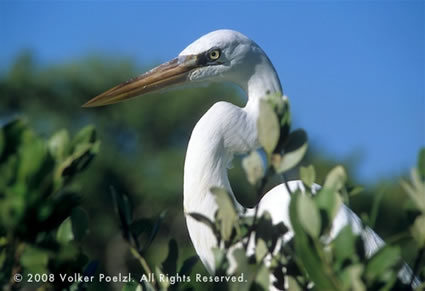
Egret.
|
It takes more than just good equipment to take great wildlife photographs. You need to be a good wildlife observer before you can become a wildlife photographer. Animals have certain habits and characteristic behaviors, and if you are aware of them, it will be much easier to get close to them and take photographs. One fact I have learned is that birds attract the presence of other birds. I visited a shelter for injured animals in Florida, and the birds that were habilitated in huge aviaries attracted a lot of wild birds to the area. I was able to get excellent close-up shots of egrets and pelicans. On the other hand, where several animal or bird species are together, one of them usually alerts the others to approaching danger. In southern Portugal I crawled through a marsh to sneak up on a flock of flamingos, but I was unaware of the small wading birds that saw me and gave my presence away to the flamingos. I could only take one photo before they all took off. This is why patience and time are so important for wildlife photography. If you spend a few days in one place you can observe the animals and learn about their habits and behavior before approaching them to take pictures. Many animals, especially birds, are habitual creatures that gather in the same area and at the same time every day — a fact you can take advantage of when planning to take wildlife photographs. Another factor is how much certain animals are used to the presence of humans. Animals react differently to our presence in different parts of the world & — even animals of the same species — depending upon how threatened they feel and how familiar they are with humans.
|
|
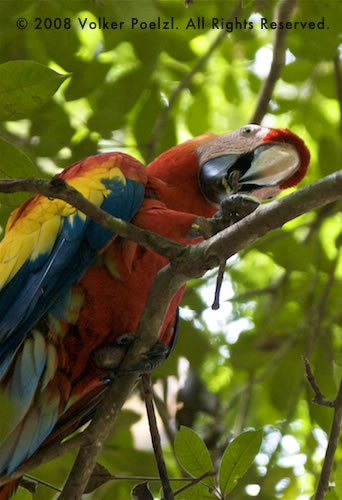
Macaw.
|
Your mode of transportation also plays a significant role in terms of how easily you will be able to spot and photograph wildlife. I remember a boat tour in Brazil’s Pantanal region — a huge floodplain — where the tour guide quickly drove me upriver in a motorboat, scaring all the wildlife along the way. In Belize, on the other hand, I joined a boat tour on which we slowly motored upstream, giving us travelers the opportunity to see dozens of bird species up-close, in addition to iguanas, crocodiles, otters, turtles, and monkeys. We stopped often and drifted back downstream as we watched the wildlife and took photos. My best shots of howler monkeys, crocodiles, and ospreys came from this daylong excursion on the Monkey River. In contrast, wildlife in the Amazon is extremely elusive. Animals are extensively hunted, and they are usually very shy. In addition, the Amazon region is so vast that most forms of wildlife are rarely concentrated in a small area, where they can easily be observed and photographed. Even when I paddled in the Amazon in my canoe on several weeklong trips, wildlife was difficult to spot, even though I kept the canoe close to the shore.
|
|
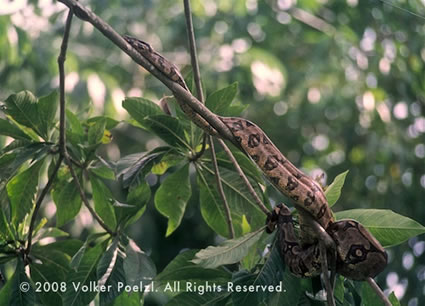
Boa.
|
For the most part, you will come upon animals unexpectedly, and you will have to act quickly to get a few pictures. This is where practice and experience come in. Before I began taking pictures of animals on my travels, I gained experience by taking pictures of wildlife and birds at home. This prepared me for the difficulties and challenges I faced when photographing an alligator in the Everglades or a river dolphin in the Amazon. As an amateur wildlife photographer, you will also discover that it pays off to make an effort to get great shots, as opposed to just waiting for a chance encounter. I remember a birding excursion in Belize where I waded through a flooded plain for several hours with other birders. While we did not see the bird species our guide had promised us, I was lucky to take pictures of a colorful pygmy kingfisher, warblers, and storks. At the end of the day, we returned to the trailhead wet and covered in mud, but with a few great pictures and sound recordings of tropical songbirds.
|
|
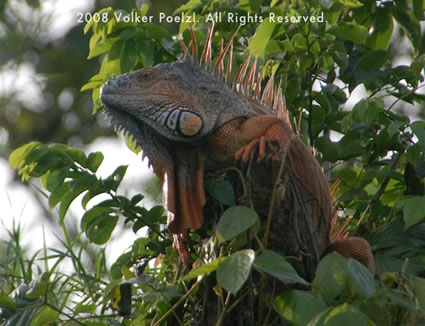
Iguana.
|
While wildlife photography gives viewers a great sense of the natural beauty of your travel destination, photos of domestic animals and wild animals that live among humans are also an interesting subject matter and often add an element of humor to travel photography.
Where to Travel for Great Wildlife Shots
|
|
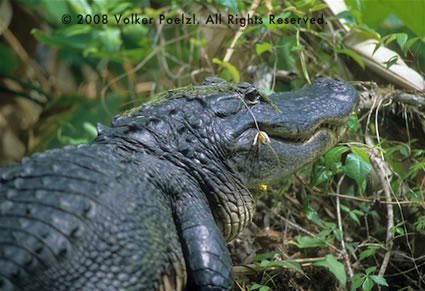
Alligator.
|
Each region of the globe offers surprising and unexpected opportunities for amateur wildlife photographers. Africa’s wide open savannahs are great for wildlife photography, but it is not necessary to book an expensive wildlife safari in Africa to take good wildlife photographs. There are many great wildlife sanctuaries, national parks, and nature reserves in our own hemisphere that offer opportunities to observe and photograph animals. And you do not always have to visit a reserve or national park. I took my best photos of toucans in a small village in Belize, where the colorful birds ate papaya from a tree next to a kiosk where I went for an afternoon drink.
When planning on visiting a nature park, keep in mind that there are certain times of the year when animals are more easily observed. Nesting habits, migratory routes, mating seasons, and climate conditions all impact animals’ behavior and habits, and it is best to do research ahead of time, so you have realistic expectations about what wildlife you might be able to see and photograph. I visited an elephant sanctuary in India at the end of the rainy reason. There were still a lot pools left over from the monsoon rains, and the elephants never came to the two permanent watering holes where the observation decks are located. Unfortunately, the US$50 fee I paid for the photography permit was not a guarantee that I would actually see a wild elephant.
Photo Editing
The final step necessary to produce a good wildlife shot is now easily done at home, thanks to the integration of digital photography and computers. But before you go crazy and use all adjustment features of your photo editing software to improve your wildlife shots, you should consider a few important facts. Keep in mind that you need a decent photograph to make improvements on your computer. To be able to successfully edit your photos at home, you need to make the right exposure choices when taking pictures. There are no adjustments you can make on your computer that will turn a blurry photo into a sharp one, a dark photo into a well-exposed one, or a small image of an animal into a close-up shot. You can, however, make a number of small adjustments that can significantly enhance your photograph. You can carefully lighten or darken certain areas of your image, sharpen or blur areas, and make adjustments to the color, contrast, saturation, etc. The key to successful photo editing is to use the adjustment tools in moderation. It is easy to over-saturate, over-sharpen, or apply other adjustments to your photos that can render them artificial. It is best to take your time and slowly experiment with the various adjustment features your editing software provides.
Volker Poelzl is a Living Abroad Contributing Editor for TransitionsAbroad.com. During his travels in over thirty countries worldwide he has taken thousands of wildlife photographs, from rare beetles to exotic birds and shy mammals.
|
